LOFT LADDERS
With a focus on quality and functionality, SOGEM has created a range of loft ladders to meet the needs of your home. SOGEM has become a specialist in loft ladders staircases, combining Scandinavian design and craftsmanship with traditional materials and cutting-edge technology to offer state-of-the-art, high-quality and energy-efficient retractable staircases. SOGEM loft ladders are produced in Denmark, and all the wood used comes from renewable sources such as FSC®-certified forests.


Loft ladders with easy installation
All our Loft ladders are developed with a focus on easy installation, and when buying a SOGEM loft ladder detailed installation instructions are always included. However, our clickFIX®/ISOCLIC Loft ladders are particularly easy to install due to their patented click system. A clickFIX®/ISOCLIC loft ladder consists of three separate components: casing, trapdoor, and loft ladder, all of which are assembled using a patented click system. None of the components for our clickFIX®/ISOCLIC Loft ladders weigh more than 11 kg, and both professionals and do-it-yourself enthusiasts will find that a clickFIX®/ISOCLIC loft ladder is much easier and quick to install than other Loft ladders on the market – it can also be done by one person.
Best insulation properties on the market
- Do you know you can reduce heat loss up to 86% with a SOGEM clickFIX®/ISOCLIC loft ladder
A clickFIX®/ISOCLIC loft ladder from SOGEM meets the highest energy standard and yes they can reduce heat loss by up to 86% compared to uninsulated traditional loft ladders and hatches. Minimal cold bridges occur because the trapdoor of the loft ladder consists entirely of highly insulating materials rather than wooden components. Our energy-efficient clickFIX®/ISOCLIC Loft ladders achieve the best insulation value on the market, and a clickFIX®/ISOCLIC loft ladder is also built on a click technology that ensures simple installation process.
Types of loft ladders

Take advantage of the space in your home with a SOGEM loft ladder
At SOGEM, we want to move the traditional mindset from square metres to cubic metres when it comes to the spaciousness of the home, and when it comes to Loft Ladders this is no exception. There are often many unused cubic metres in the loft space and our loft ladders therefore plays a key role in optimising and utilising the home's useable space in the safest and most effective way.
Our loft ladders are certified to the highest possible standards
At SOGEM, we complete testing on all our loft ladder range, and more specifically, we test the U-value on the entire building component. Therefore, we do not only settle for a calculated value since a calculated value simply gives an estimate and not a desired tested value. In addition, we do not test a loft ladder on just one point, but on the entire product, and in this way the most realistic insight into the insulation performance and heat loss of a loft ladder is obtained. There are many ways a product can be tested; we ensure our standards are market leading offering the most reliable promises to our customers.
Maintenance of a loft ladder
A loft ladder/loft with ladder does not normally require any maintenance beyond regular cleaning with a cloth and some soapy water. However, with a relatively small effort, the functions of the stairs can be kept intact.
U-values According to EN 14351-1:2006+A2:2016, EN ISO 10077-1:2006, and EN ISO 10077-2:2017
SOGEM has got Loft ladders with low U-values as a result of excellent heat insulation, the clickFIX®/ISOCLIC trapdoor is insulated with a thick polystyrene layer and white facing. Our clickFIX®/ISOCLIC loft ladders have the market leading U-values. We assess the U-values of our loft ladders as building components, similar to doors and windows. A lower U-value indicates better insulation and reduced heat loss. At SOGEM, we provide certification for the U-values of our loft ladders, ensuring energy efficiency.
No thermal bridge with patented clickFIX®/ISOCLIC technology
With the SOGEM clickFIX® loft ladders a new standard is set. You have the security that you will have no thermal bridges from the loft ladder. Because the trapdoor solely consists of high-insulating material and no wooden construction. The unique sealing also ensures air-tightness. All this allows us to achieve excellent heat insulation for your home.
Airtightness of Loft Ladders According to EN 12207 and EN 1026:2016
SOGEM's unique sealing system plays a critical role in preventing drafts and heat loss. We have developed a sealing system that ensures a tight closure between the trapdoor and the frame, effectively blocking drafts and preserving heat. Our loft ladders are tested according to EN 1026:2016 and classified in accordance with the EN 12207 standard for airtightness.
Approved for 150 kg loading
SOGEM loft ladders go through at least 3 different tests before they enter the market. We test the insulation capacity U-value, we test air-tightness EN 12207 and we test the loft ladders strength according to EN 14975. Our loft ladders are approved up to 150 kg, but we test up to 265 kg.
Fire-resistant REI 45 loft ladders
SOGEM have a special series of fire-resistant loft ladders - REI 45 which have been tested according to the new European standard. REI stands for: R (resistance) carrying capacity during fire. E (integrity) ability to keep flames and gases out. I (insulation) ability to keep out warmth. The 45 minutes indicates for how long the loft ladder can withstand a fire. Hence SOGEM REI 45.
Easy installation
Thanks to its low weight and patented assembly technology with click modules, clickFIX®/ISOCLIC can also be easily installed by one person. It's simple: align casing, screw in place, click on the trapdoor and ladder section and adjust to the room height - job done! To ensure a perfectly airtight installation. A vapour barrier is supplied with this product. This ensures an airtight connection between the loft ladder and the ceiling construction.
Light operation
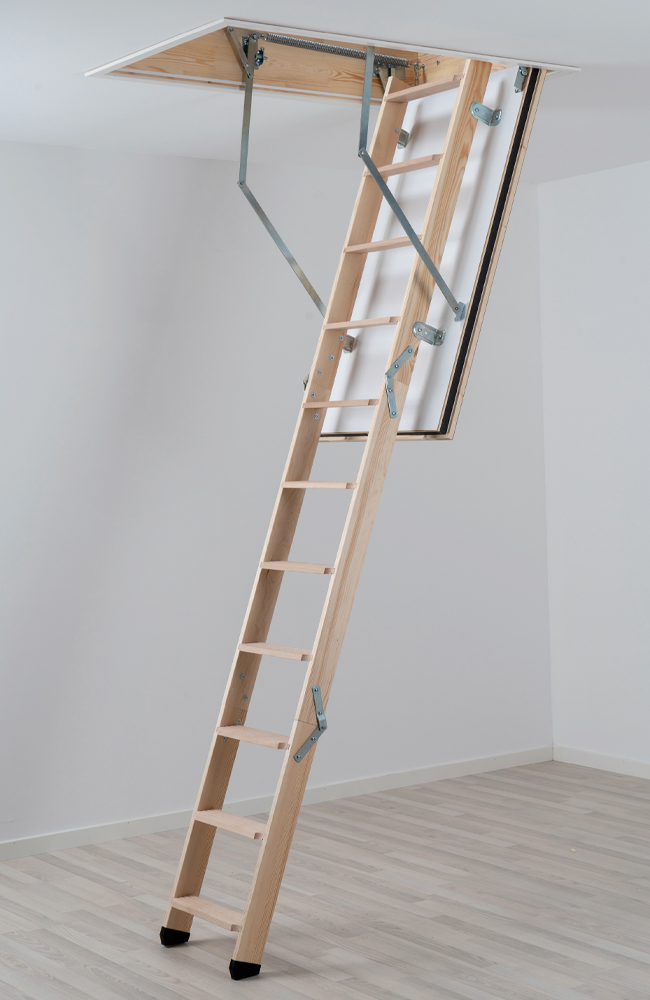
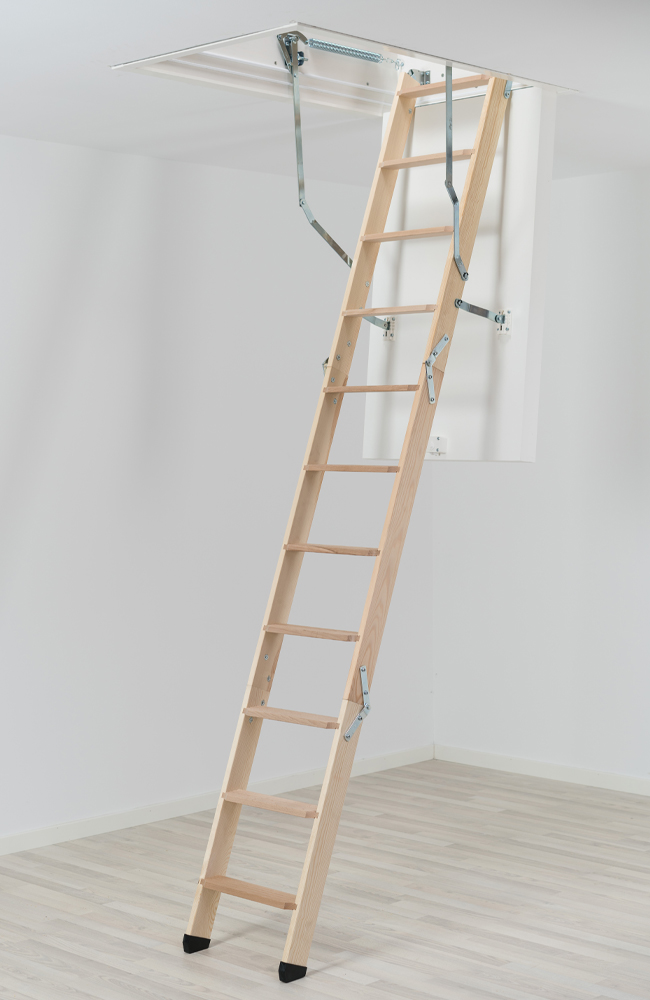
The ladder comes with a well-developed spring system making the loft ladder extra easy to handle! Some would call them light as a feather. To provide extra comfort and safety, the loft ladder is equipped with deep anti-slip treads and a handrail. It is possible to buy additional handrail to the ladder for support on both sides! The safe way up.
Danish quality
Scandinavian design and craftmanship are combined with traditional materials. SOGEM loft ladders are manufactured in Denmark under ISO certified systems, our timber is primary sourced from renewable FSC certified forests. We are constantly expanding our product range and are working on technical improvements and innovations: For example, SOGEM pioneered thermal insulation and developed windproof installation solutions for loft ladders. SOGEM since 1951…
F.A.Q. LOFT LADDERS
Before launching a new loft ladder, we always test them thoroughly to ensure that the loft ladders meet legal requirements, industry standards and guidelines as well as our own quality demands. Our loft ladders are subjected to many different types of tests. We test the insulation capacity U-value, we test airtightness EN 12207 and we test the loft ladder's strength, repetition testing on closing mechanisms and hinges as well as tensile testing according to EN 14975. Our loft ladders are approved up to 150 kg, but we test up to 265 kg.
Our loft ladders have the market leading U-values and are tested as a building component like doors and windows. The lower u-value, the lower heat loss. At SOGEM you can get the certificate on our tested U-values.
With the SOGEM clickFIX®/ISOCLIC loft ladders a new standard is set. You have the security that you will have no thermal bridges from the loft ladder. Because the trapdoor solely consists of high-insulating material and no wooden construction. The unique sealing also ensures airtightness. All this allows us to achieve excellent heat insulation for your home.
The unique sealing system in SOGEM's loft ladders is very important as it protects against draft and heat loss. We have developed a sealing system to ensure that the gap between the trapdoor and the frame is tight preventing draft and heat loss. Our loft ladders have been tested at IFT Rosenheim according to the highest airtight class 4 - EN 12207.
SOGEM also have a series of fire-resistant loft ladders - REI 45/60 which have been tested according to the new European standard. REI stands for:
R (resistance) carrying capacity during fire.
E (integrity) ability to keep flames and gases out.
I (insulation) ability to keep out heat.
The 45/60 minutes indicates for how long the loft ladder can withstand a fire. Hence SOGEM FIRE PRO REI 45 and REI 60 VARIO.
Thanks to the loft ladders low weight and patented assembly technology with click modules, clickFIX®/ISOCLIC loft ladders can also be easily installed by one person. It's simple: align casing, screw in place, click on the trapdoor and ladder section and adjust to the room height - job done! To ensure a perfectly airtight loft ladder installation. Vapour barrier is supplied with the loft ladder. This ensures an airtight connection between the loft ladder and the ceiling construction.
The loft ladder comes with a well-developed spring system making the loft ladder extra easy to handle! Some would call our loft ladder light as a feather. To provide extra comfort and safety, the loft ladder is equipped with deep anti-slip treads and a handrail. It is possible to buy additional handrail to the ladder for support on both sides! The safe way up.
Danish design and craftmanship are combined with traditional materials. Some of SOGEM loft ladders are manufactured in Denmark under ISO certified systems, our timber is primary sourced from renewable FSC certified forests. We are constantly expanding our product range and are working on technical improvements and innovations: For example, SOGEM pioneered thermal insulation and developed windproof installation solutions for loft ladders. (DOLLE GROUP since 1951)
Accessories & spare parts
Find spare parts or accessories for your loft ladder based on the specific product number.